iOS Switch Control has two different modes to help you control your iPhone, iPad or iPod Touch.
In this blog, we explain the two different scanning modes: Item Mode and Gliding Cursor. Learn more about these scanning modes and how to alternate between them.
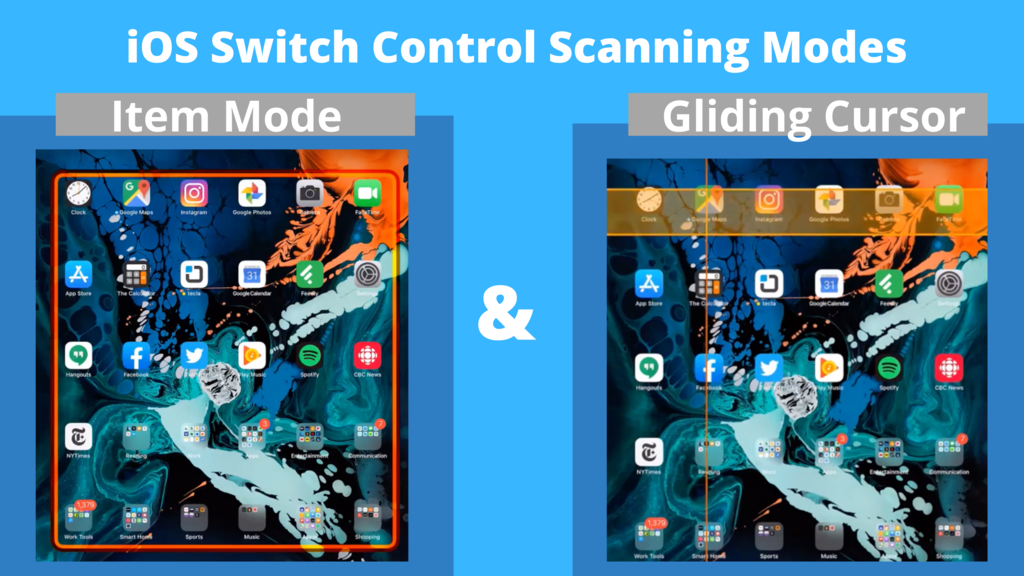
Item Mode frames items on the screen by group, row or an individual element. You can adjust the scanning speed and select that the frame goes by group or row to make the navigation faster.
In Gliding Cursor (Point Mode in iOS 12 and earlier) a vertical bar comes panning left to right and when you press your switch and select an area, a horizontal bar comes panning top to bottom for you to select a point on the screen. At that point, the system will tap as if you were using your finger and you are also able to do a gesture. This mode is useful for games or busy screen with lots of links.
We receive many questions about this mode because users may get into it and since they are not familiar with it they do not know how to switch. In order to change modes, you need to be able to access the Scanner Menu.
Depending on your Switch Control settings this could be done in different ways but the easiest way is to set “Tap Behavior” to Default. This will bring the Scanner Menu every time you select an item. Auto Tap will tap automatically unless you double-click your switch. Always Tap will add the Scanner Menu to the end of every screen.
Once you are able to access the Scanner Menu you can change from Gliding Cursor to Item Mode and vice-versa. Depending on your menu items you may need to go to the next page in the Scanner Menu and can do so by selecting the small dots at the bottom.
Related Blogs
** This post was originally published on https://gettecla.com/blogs/news/ios-switch-control-scanning-modes